Are you looking to transform your sloping backyard into a stunning and functional space? Building a retaining wall on a slope is the perfect solution to prevent erosion, create flat areas for planting or seating, and add an eye-catching element to your landscape. While it may seem like a daunting task, with the right planning and step-by-step approach, you can successfully build a retaining wall that will stand the test of time.
In this comprehensive guide, we will walk you through each stage of how to build a retaining wall on a slope. From choosing the right materials to ensuring proper drainage, we’ll provide you with all the essential information and expert tips to make your project a resounding success. So grab your tools and let’s get started on how to build a retaining wall on a slope that will enhance both the beauty and functionality of your outdoor space.
Planning and Designing the Wall
One of the crucial steps on how to build a retaining wall on a slope is proper planning and designing. Before you start digging or stacking blocks, take some time to carefully consider the layout and purpose of your wall. Here are some key factors to keep in mind:
- Assessing the Slope: Begin by evaluating the slope’s angle and stability. Steeper slopes may require more extensive measures, such as terracing or multiple-tiered walls, while gentle slopes may only need a single retaining wall. Understanding the terrain will help determine the height and width of your wall.
- Determining Wall Height: Consider what you’ll be using the retained space for – whether it’s creating flat areas for gardening or providing seating options. This will influence how tall your wall needs to be. Keep in mind that taller walls may require additional engineering considerations.
- Selecting Materials: Choose materials that not only complement your landscape but also provide adequate strength and durability for retaining soil on a slope. Popular options include concrete blocks, natural stones, timber sleepers, or even gabion baskets filled with rocks.
- Checking Regulations: Check with local authorities regarding permits and regulations before starting construction. Some areas have restrictions on wall height or material choices due to safety concerns.
- Design Considerations: Think about incorporating curves or terraces into your design to add visual interest and enhance functionality in uneven landscapes. Additionally, plan for proper drainage by including weep holes or gravel-filled trenches at regular intervals along the base of the wall.
By carefully considering these aspects during the planning phase, you’ll lay a solid foundation for constructing an effective retaining wall that will withstand both nature’s forces and time itself.
Choosing the Right Wall Material
Choosing the right wall material for your retaining wall on a slope is crucial in ensuring its durability and functionality. There are several options available, each with its own pros and cons.
- Concrete blocks are a popular choice due to their strength and versatility. They come in various sizes and shapes, allowing you to create a customized look for your wall. However, they can be heavy and may require professional installation.
- Another option is a natural stone, which adds an elegant touch to any landscape. Stone walls have a timeless appeal and can withstand harsh weather conditions. On the downside, they can be more expensive than other materials and may require skilled labor for installation.
- Timber is also commonly used for retaining walls on slopes. It is cost-effective and easy to work with, making it suitable for DIY projects. However, timber may not be as durable as other materials and requires regular maintenance to prevent rotting or warping.
- Interlocking concrete blocks provide a balance between affordability and ease of installation. These blocks fit together like puzzle pieces without the need for mortar or adhesive. They offer good stability while still allowing some flexibility in case of ground movement.
- Gabion walls consist of wire mesh containers filled with rocks or gravel. They provide excellent drainage capabilities while adding an industrial aesthetic to your landscape design. However, gabion walls may not be suitable if you’re looking for a smooth finish or want privacy.
In conclusion (as per instructions), choosing the right wall material depends on factors such as budget, desired aesthetics, skill level required for installation, durability requirements, etc.
Essential Equipment and Tools
When it comes to building a retaining wall on a slope, having the right equipment and tools is crucial. Here are some essential items you’ll need to ensure your project goes smoothly:
- Shovel: A sturdy shovel is indispensable for digging the foundation and leveling the surface. Look for one with a strong handle and sharp blade.
- Wheelbarrow: Moving heavy materials like gravel or soil can be backbreaking without a wheelbarrow. Invest in a durable one that can hold plenty of weight.
- Level: To ensure your wall is straight and level, a good-quality level is essential. Make sure it’s long enough to span the width of your wall.
- Rubber Mallet: A rubber mallet will come in handy when placing blocks or stones into position. It allows you to gently tap them into place without causing damage.
- Tape Measure: Accurate measurements are crucial for planning and designing your retaining wall correctly. Keep a tape measure handy at all times during construction.
Remember, safety should always be prioritized when using any tools or equipment on site. Wear appropriate protective gear such as gloves, safety glasses, and sturdy footwear to minimize accidents or injuries. Having these essential tools readily available will make the process of building your retaining wall on a slope much more manageable and efficient
Step 1: Check with the Authorities
Building a retaining wall on a slope is an exciting project that can transform your outdoor space. However, before you dive in, it’s crucial to start with the necessary groundwork. One of the first steps you should take is to check with the authorities.
Why is this important? Well, building codes and regulations vary from one location to another. By checking with local authorities such as your city council or municipality, you can ensure that you are following all required guidelines for constructing a retaining wall on your slope.
Authorities may have specific requirements regarding height restrictions, setback distances from property lines or structures, and even permits that need to be obtained before construction begins. It’s essential to familiarize yourself with these rules so that your project goes smoothly and avoids any potential legal issues down the line.
Don’t worry; contacting local authorities doesn’t have to be complicated. Simply reach out to their offices or visit their website for information on building codes and regulations related to retaining walls. They will provide valuable guidance and help clarify any questions or concerns you may have about your project.
Remember, doing due diligence by checking with the authorities early in the process will save you time, money, and headaches later on – ensuring that your retaining wall meets all necessary requirements while keeping your outdoor space safe and beautiful.
Step 2: Prepare the Foundation
When it comes to building a retaining wall on a slope, one of the most critical steps is preparing the foundation. A strong and stable foundation is crucial for ensuring that your wall will stand the test of time.
To begin, you’ll need to excavate the area where the wall will be built. Start by removing any grass or vegetation from the surface. This will help create a clean and level base for your wall.
Next, dig a trench along the length of where your wall will go. The depth and width of this trench will depend on the size and height of your retaining wall. As a general rule, aim for at least one-third of your block’s height below ground level.
Once you’ve dug your trench, it’s important to compact soil in order to provide stability for your retaining wall. Use a hand tamper or mechanical compactor to firmly pack down the soil in layers as you fill in the trench.
After compacting the soil, add a layer of crushed stone or gravel to further enhance drainage capabilities. This layer should be about 4-6 inches thick and evenly spread across the entire base of your trench.
Use a straight board or level tool to ensure that your foundation is completely level before proceeding with building your retaining wall on top. Taking these extra measures during step two will lay an excellent groundwork for constructing a sturdy and durable retaining wall on a slope!
Remember, each step in building a retaining wall plays an integral role in its overall strength and longevity – so take care not to rush through any part of this process
Step 3: Level the Surface
Now that you have prepared the foundation for your retaining wall, it’s time to move on to the next crucial step – leveling the surface. This is an essential part of ensuring a sturdy and stable wall that can withstand the pressures of sloping terrain.
To begin, use a level tool to assess the slope of your land. This will help you determine how much adjustment is needed to create a flat surface for your retaining wall. You may need to excavate or fill certain areas in order to achieve this balance.
Once you have identified any uneven spots, start by removing excess soil or debris from those areas. Use a shovel or rake to carefully even out the ground and create a smooth base for your wall.
Next, compact the soil using either a hand tamper or a plate compactor. This step is crucial as it helps increase stability and prevents shifting over time.
After compacting, check again with your level tool to ensure that the surface is completely even. Make any necessary adjustments until you are satisfied with its flatness.
Add a layer of gravel evenly across the leveled surface before proceeding with stacking blocks or laying other materials for your retaining wall construction. The gravel provides additional drainage and helps prevent water buildup behind the wall.
Taking these steps will guarantee that your retaining wall has a solid foundation on which it can be built securely and effectively to tackle any challenging slopes.
Step 4: Properly Stack the Blocks
Building a retaining wall on a slope requires careful consideration and proper techniques to ensure its stability and longevity. One important step in this process is properly stacking the blocks, which will determine the overall strength and functionality of your wall.
When it comes to stacking the blocks, it’s crucial to start with a solid foundation. This means ensuring that the base of your wall is level and compacted. Use a shovel or hand tamper to remove any loose soil or debris, creating a flat surface for your first row of blocks.
Once you have prepared the foundation, begin placing your blocks in an interlocking pattern. Make sure each block sits firmly against the one beside it, using shims if necessary to achieve a snug fit. This will help prevent any shifting or movement over time.
As you stack each row, be mindful of maintaining proper alignment and verticality. Use a level tool regularly throughout this process to ensure that your wall remains straight and even from top to bottom.
Consider using adhesive between the layers of stacked blocks for added stability. Apply a generous amount along each joint as you progress upward with each row. This will help bond the blocks together securely and minimize potential gaps or weaknesses in your wall structure.
Take time to step back periodically during construction to assess the overall appearance and integrity of your stacked retaining wall. Adjust as needed before continuing with subsequent layers until reaching your desired height.
By following these steps when stacking your retaining wall blocks on a slope, you can create an effective barrier that not only holds back soil but also adds beauty and functionality to your landscape design.
Step 5: Ensure Proper Drainage
Proper drainage is crucial when building a retaining wall on a slope. Without it, water can accumulate behind the wall and put immense pressure on the structure, leading to potential failure. To prevent this from happening, here are some essential tips for ensuring proper drainage.
You need to create a way for water to escape from behind the wall. This can be done by installing weep holes at regular intervals along the base of the wall. Weep holes allow excess water to drain out freely and relieve hydrostatic pressure.
Consider using gravel or crushed stone as backfill material instead of soil. These materials promote better drainage by allowing water to percolate through them quickly. Be sure to compact each layer of backfill properly as you go.
Additionally, adding a layer of landscape fabric between the backfill and soil can help prevent clogging over time. The fabric acts as a barrier that allows water to pass through but keeps fine particles from seeping into the drainage system.
Furthermore, incorporating an effective French drain system can further enhance drainage efficiency. A French drain consists of perforated pipes wrapped in geotextile fabric buried behind the retaining wall and connected to an outlet for directing excess water away from your property.
Regularly inspect and maintain your drainage system after construction is complete. Clear any debris or blockages in weep holes or drains to ensure continued functionality.
By following these steps and taking care with proper drainage during construction, you will greatly increase the longevity and stability of your retaining wall on a slope.
Step 6: Backfill Correctly
When building a retaining wall on a slope, proper backfilling is crucial to ensure the stability and longevity of your structure. Backfill refers to the material that is placed behind the wall to provide support and prevent soil erosion. Here are some important tips for backfilling correctly.
First, start by placing a layer of gravel or crushed stone at the base of the wall. This will help with drainage and prevent water from accumulating behind the wall, which can cause pressure and damage over time. Make sure this layer extends beyond the width of your blocks or stones.
Next, use compacted soil as your main backfill material. It’s important to add thin layers at a time and compact each layer thoroughly using a hand tamper or plate compactor. This will help create a solid base for your wall and minimize settling in the future.
As you backfill, it’s also essential to periodically check for any gaps between blocks or stones. If you notice any voids, fill them with additional soil and compact it firmly into place. This will ensure that there are no weak spots in your retaining wall structure.
Additionally, consider using geotextile fabric between each course of blocks or stones before adding backfill material. This fabric helps improve drainage while preventing soil particles from seeping through small openings in the walls.
Make sure to leave enough space between the top of your retaining wall and where you plan to finish off with landscaping materials like plants or mulch. This gap allows room for proper grading and prevents excessive moisture accumulation against your structure.
Remember that proper backfilling is vital for maintaining structural integrity when building a retaining wall on a slope! Take these steps seriously to avoid costly repairs down the line.
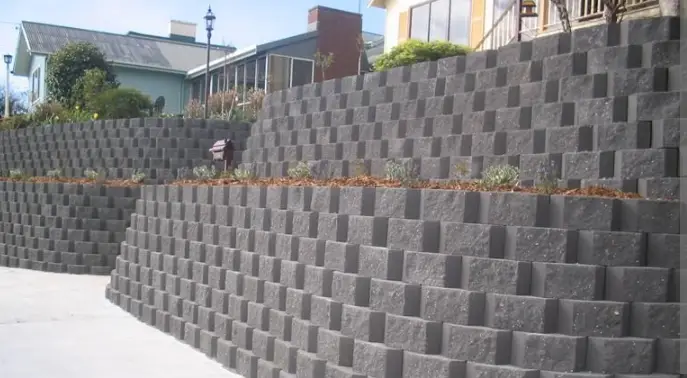
Step 7: Consider Multiple Tiered Walls
When building a retaining wall on a slope, sometimes one wall may not be enough to effectively hold back the soil. That’s where the concept of multiple-tiered walls comes into play. By creating multiple layers or tiers of walls, you can provide added stability and support to your overall structure. Here are some key considerations for implementing this technique:
- Evaluate the slope: Before deciding to build multiple-tiered walls, it’s crucial to assess the angle and steepness of your slope. Steeper slopes will require more tiers to effectively distribute the pressure and prevent erosion.
- Plan the layout: Determine how many tiers you need based on the height and length of your slope. It’s important that each tier is properly aligned with proper drainage channels in between them.
- Choose appropriate materials: Selecting durable materials such as concrete blocks or natural stones is essential for constructing sturdy tiered walls that can withstand varying degrees of pressure from different levels.
- Provide adequate drainage: Just like with single-level retaining walls, proper drainage is crucial for preventing water buildup behind each tiered wall segment. Install weep holes or gravel-filled trenches at regular intervals to ensure efficient water flow.
- Seek professional assistance if needed: Building multiple-tiered retaining walls requires careful planning and execution, especially when dealing with complex terrain or high slopes. If you’re unsure about any aspect of this process, don’t hesitate to consult with an experienced contractor or engineer who specializes in retaining wall construction.
Remember that safety should always be paramount when working on any construction project involving slopes and earth retention systems like retaining walls.
Final Thoughts and Tips on How to Build a Retaining Wall on a Slope
Building a retaining wall on a slope can be a challenging but rewarding project. By following the steps outlined above, you can create a sturdy and visually appealing structure that will help prevent erosion and add value to your property. Here are some final thoughts and tips to keep in mind:
- Safety First: Always prioritize safety when working on any construction project. Wear appropriate protective gear, use caution when operating equipment, and follow all safety guidelines.
- Seek Professional Advice: If you’re unsure about any aspect of building a retaining wall on a sloped surface or if the slope is particularly steep or unstable, it’s wise to consult with an experienced contractor or engineer who specializes in these types of projects.
- Regular Maintenance: To ensure the longevity of your retaining wall, perform regular inspections for signs of damage such as cracks or bulging. Address any issues promptly to prevent further deterioration.
- Consider Aesthetics: While functionality is essential, don’t overlook the visual appeal of your retaining wall. Choose materials that complement your landscape design and consider adding plants or decorative elements to enhance its overall look.
- Proper Drainage is Key: Adequate drainage behind the retaining wall is crucial for preventing water buildup that can exert excessive pressure on the structure over time. Incorporate proper drainage techniques during construction to avoid potential problems down the line.
- Take Your Time: Building a retaining wall on a slope requires careful planning and execution; rushing through the process may result in subpar results or even failure of the structure itself. Be patient and meticulous with each step to ensure long-lasting success.
With these tips in mind, you’re now equipped with valuable knowledge on how to build a retaining wall on a slope successfully! Remember that every project is unique, so adapt these guidelines accordingly based on your specific requirements and conditions.
